PAGES

SLIDER

How to Make Fall Leaves - Part #2

Friday, November 7, 2014

 This is the second half of a 2 part tutorial on making fall leaves. In the first half I showed you how to cut out a leaf and make it look more realistic. Click here to read Part #1.  In Part #2, I'll discuss using different petal dusts on your leaves to achieve bold vibrant colors.


At the top of this picture is a plain yellow leaf that was cut out of gum paste. Below it are three examples of the same basic leaf that were brushed with different colors of petal dust. Yes... even the orange leaf started out yellow. The color possibilities are endless!!!


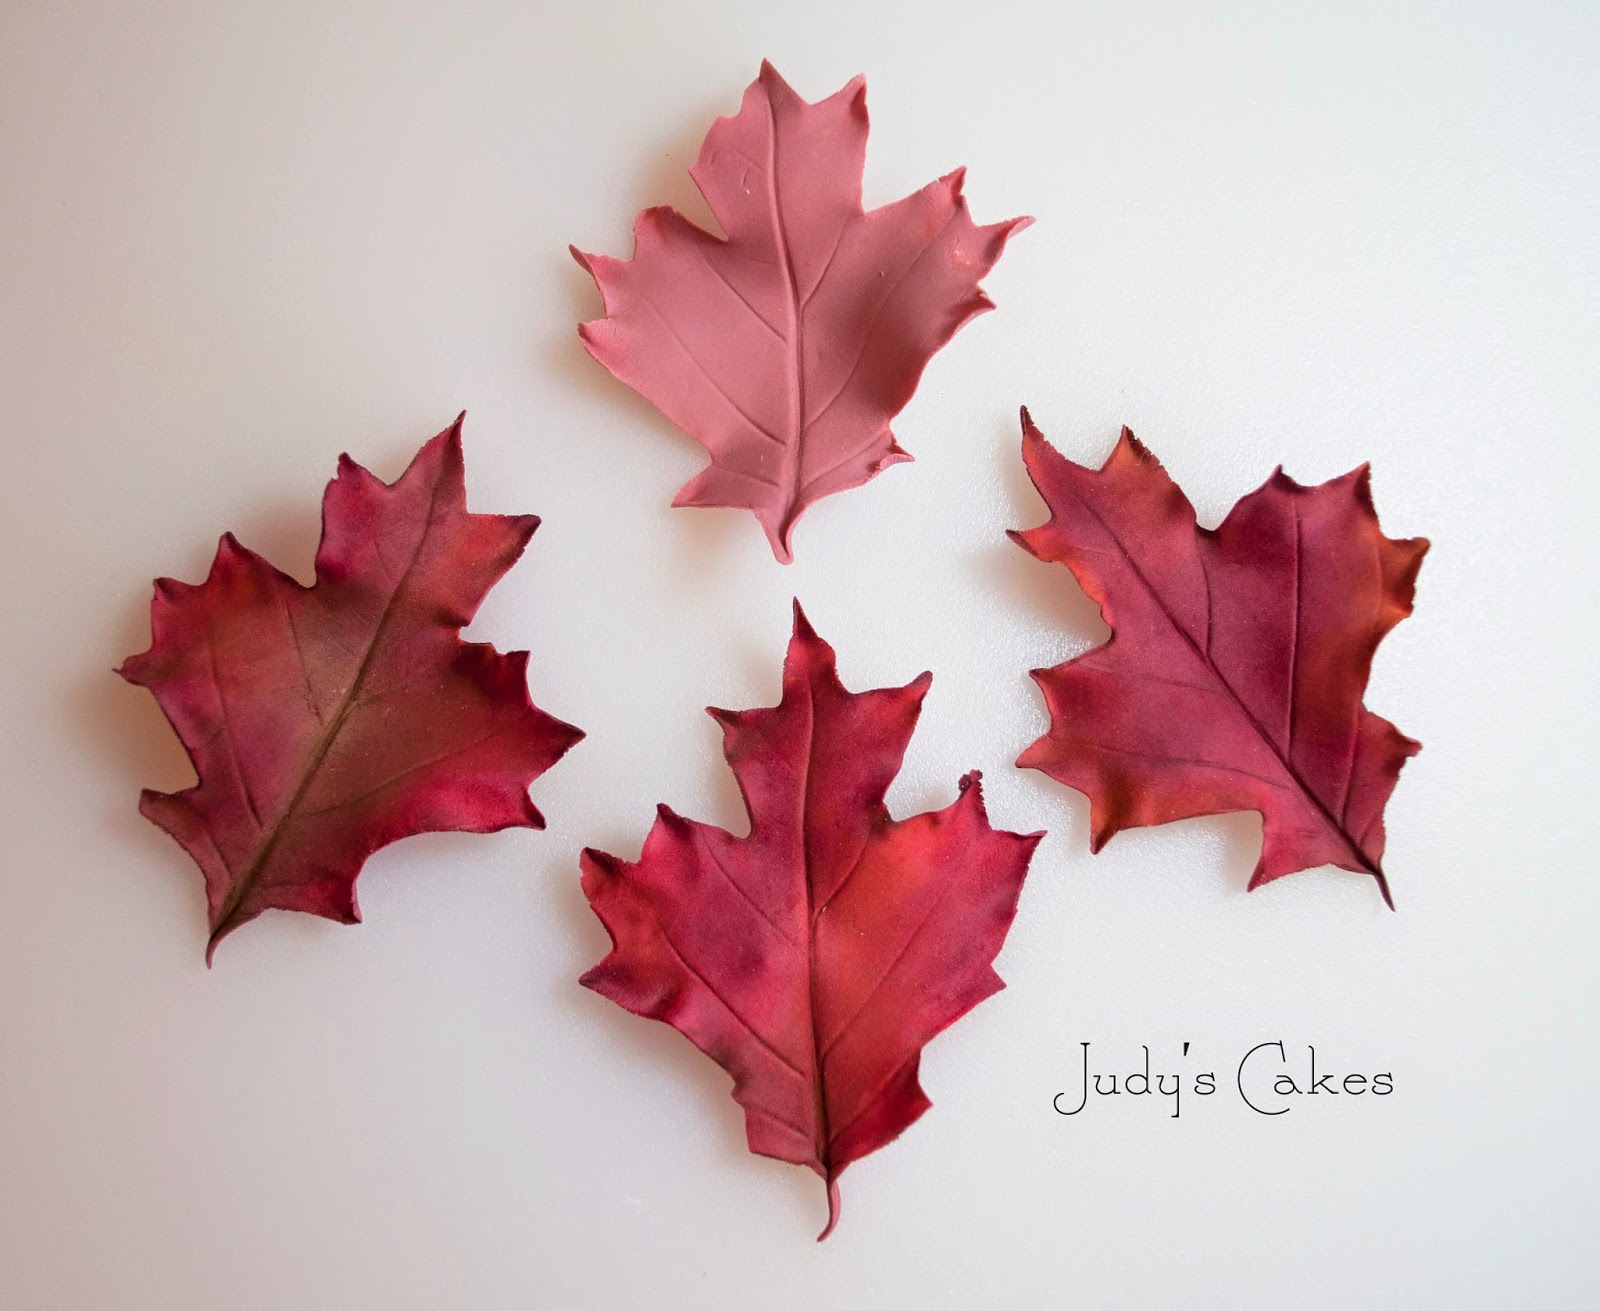
Here's a similar example to the one above. Except I used pink gum paste instead of yellow to make the basic leaf.

Before we get started, here are a few basic rules to keep in mind:

1- Never start out using dark colors. 
You can always make a color darker... but it's almost impossible to lighten it up! This same rule applies to both gum paste and petal dust. By starting out light,  it's easier to vary the value and intensity of each color.
2- Less is more.
Begin by adding colors a little at a time. You can always apply more color later... but it's very difficult to remove once it's on.
3- Blend the edges of the colors together.
Doing this will make the colors flow together naturally, so they won't look spotted or splotchy. Be careful, however, not to over blend!
4- Don't worry if the tips or small parts of your leaf break off.
The truth about fall leaves is that they're either drying up or already dead. Take a look at real leaves... you'll notice that they're all shriveled up, crumbly, torn, or even have holes in them. Leaves are not perfect. In fact, they'll look more realistic if they have flaws.
5- Use many different colors of petal dust on each leaf. 
Don't be afraid to make extra leaves and experiment with your colors. You won't know how they work unless you try them. 
6- Use a lot of different brushes.
I use small paint brushes to apply the petal dust. For this tutorial, I used one brush for the yellows, one for the greens, one for the light reds and oranges, and one for the dark reds and burgundy. Plus I had one very tiny brush for only dark brown.

OK... let's start with the yellow leaf.
I began by dusting a mid-tone yellow here and there, concentrating on the center of the leaf.


Then I randomly add light orange to a few other places on the leaf.


Next, I deepen the color by adding a mid-tone orange to the outside edges of the light orange spots.


Then I add a couple of different reds to the outside areas of the dark orange. The farther out from the center I go, the darker the colors become. Finally, I hit a few of the lighter spots with bright yellow. This helps add vibrancy to the leaf.


The next step is to add a just a touch of dark brown. Using the flat side of your tiny brush, stroke upward across the very outside edge of your leaf. This helps bring dimension and realism to it's appearance. Finally, add just a hint of brown to the veins. Be careful not to go too dark, or the veins will look like you drew them in.


There's a huge variety of colors you can make with a basic yellow leaf. Play around a little, and see what kind of colors you can come up with.


Next up... the red leaf.
I start by adding a reddish orange color to different parts of the leaf.


Next I brush on a mid-tone red to the remaining areas.


I deepen a few of the reds by adding an even darker red color.


 Finally, to make the dark reds look even richer... add burgundy to a few spots. You can also add some pink or light orange to brighten the lighter areas. Finish off by touching just the outside edge of your leaf with dark brown, and then lightly trace over the veins. (Do this the same way it was described above for the yellow leaf.) 


Here's an example of a variety of colors you can achieve by starting out with the same basic pink leaf. Try using different shades of orange, pink, red,  burgundy, and even a little dark green. 


These fall leaves are a great way to practice your skills. Don't be afraid to play around and use a variety of color combinations. You can even try adding blue or purple to your color scheme! If a leaf breaks... don't worry, it doesn't matter. You can still use it! The whole idea is to discover new ways to use color and to have fun. You might even be surprised at how artistic you can be!!! 

How to make Fall Leaves - Part #1

Thursday, November 6, 2014

Fall is my favorite time of year! The harvest season finally is over, the crisp autumn air moves in, and the kids go back to school. It seems that life becomes more relaxed, and everything begins to slow down just a bit. One of my favorite things about this time of year is watching the leaves transform into a beautiful display of colors!

Where I grew up, the leaves pretty much went from green to yellow to dead. Although it was beautiful, those leaves can't compare to the kaleidoscope of autumn colors found in other areas of the country. I now live in Utah, surrounded by majestic mountains with several canyons only minutes away from my front door. If you drive through these canyons during the fall season, the array of colors you'll see is simply breathtaking! 

A few weeks ago, I decorated a cake with several different fall flowers and leaves. Some people asked me how I made these leaves, while a few even thought they were real! Now that's quite a compliment! (Pardon me... I'm blushing at the moment. LOL)  So I thought I'd put together a tutorial to show you how it's done. 

This tutorial will be broken up into to two blog posts. Part #1 will show you how to cut out the leaves. Part #2 will show you how to color the leaves. 


PART ONE:  Cutting out the leaf.
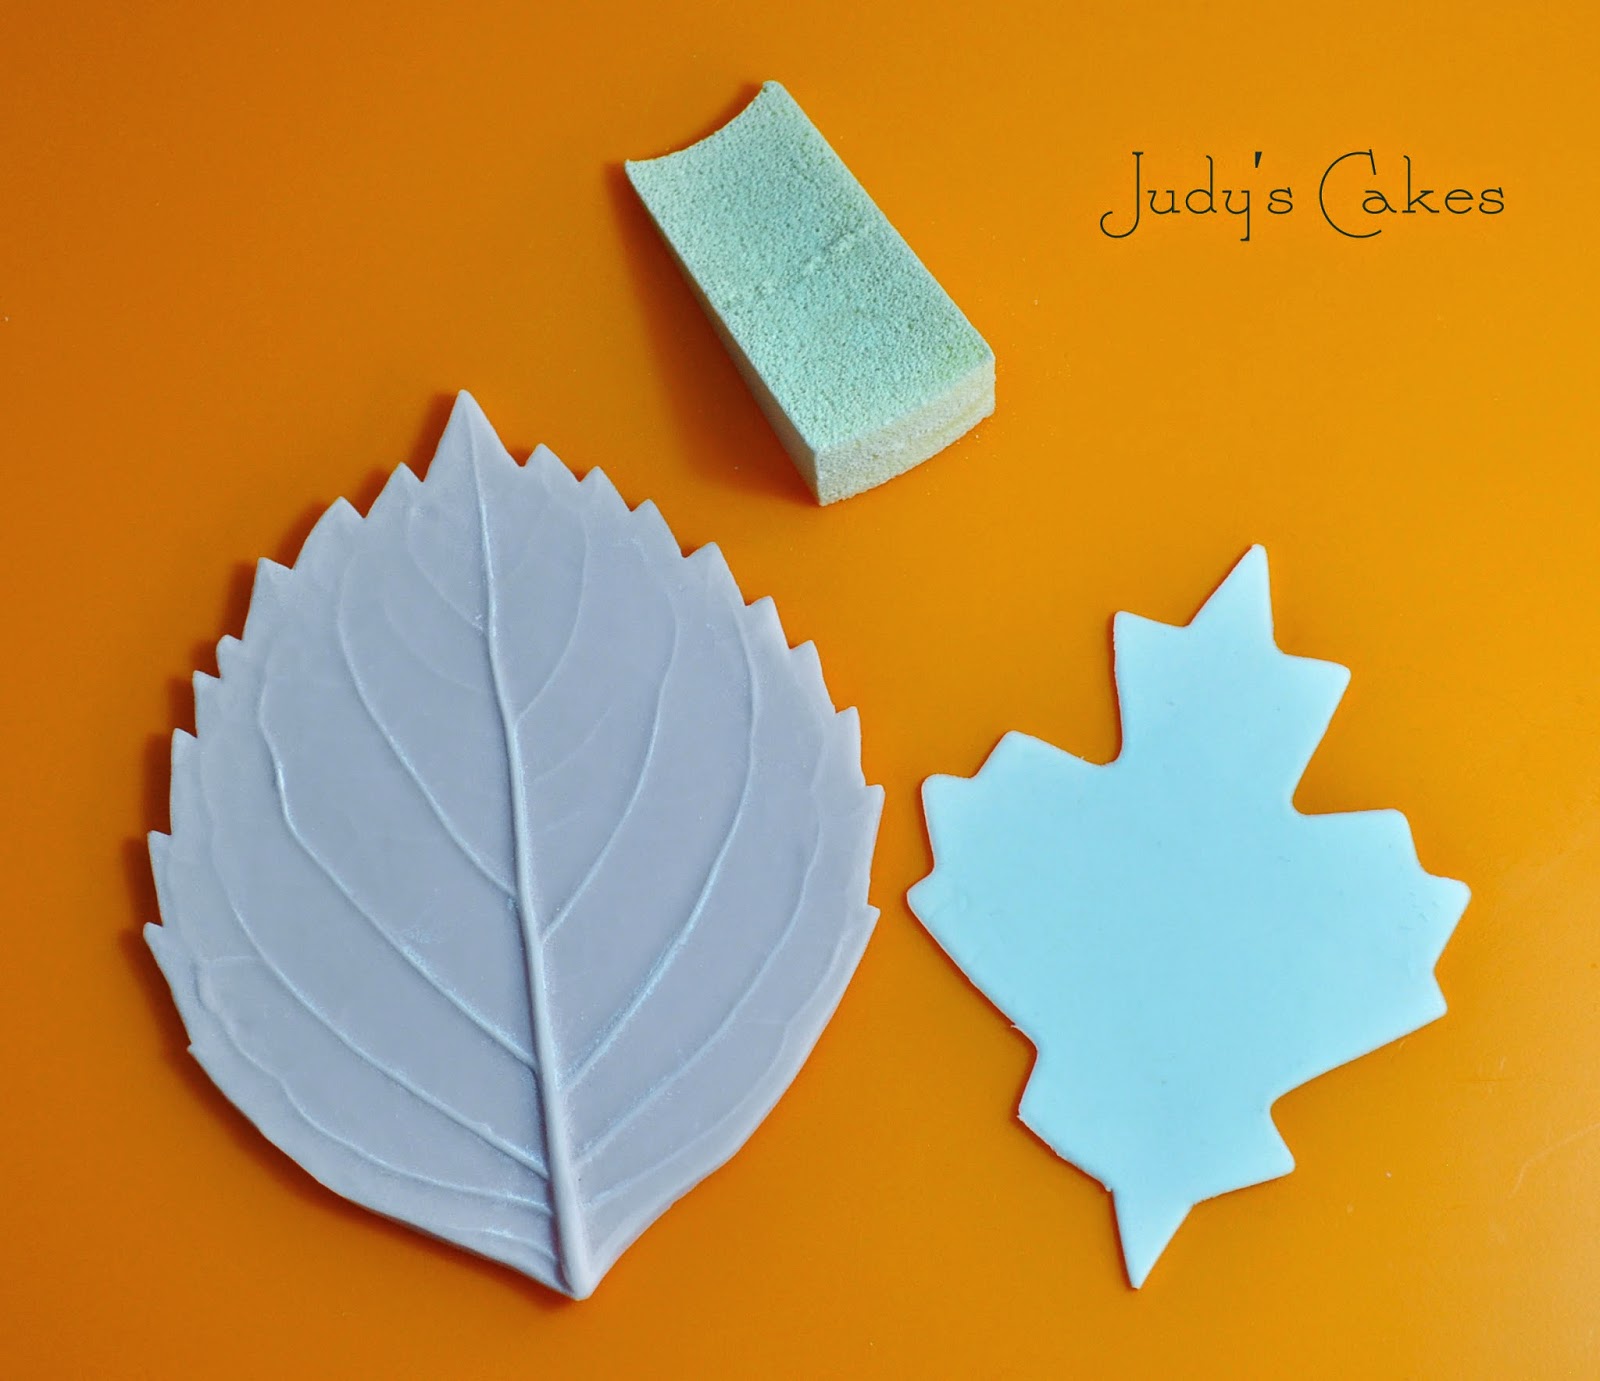
You'll need: gum paste, rolling pin, ball tool, foam pad, triangle makeup sponge, leaf cutter, and a leaf veiner. 


Roll the gum paste out until it's thin. Place it over the top of the leaf cutter. Roll the rolling pin over the gum paste, then run your finger across the edge of the cutter. Doing this will give you a much cleaner cut edge. 

The leaf cutter I used has an annoying thick stem at the bottom of the leaf. (I have no idea why they designed it that way!) Use a sharp knife to cut the outer edges of the stem off so it'll look more realistic.

Next get your veiner and makeup sponge ready.

Place your leaf over the top of the veiner. Then, using the makeup sponge, press down on the leaf to imprint the vein details onto the gum paste.

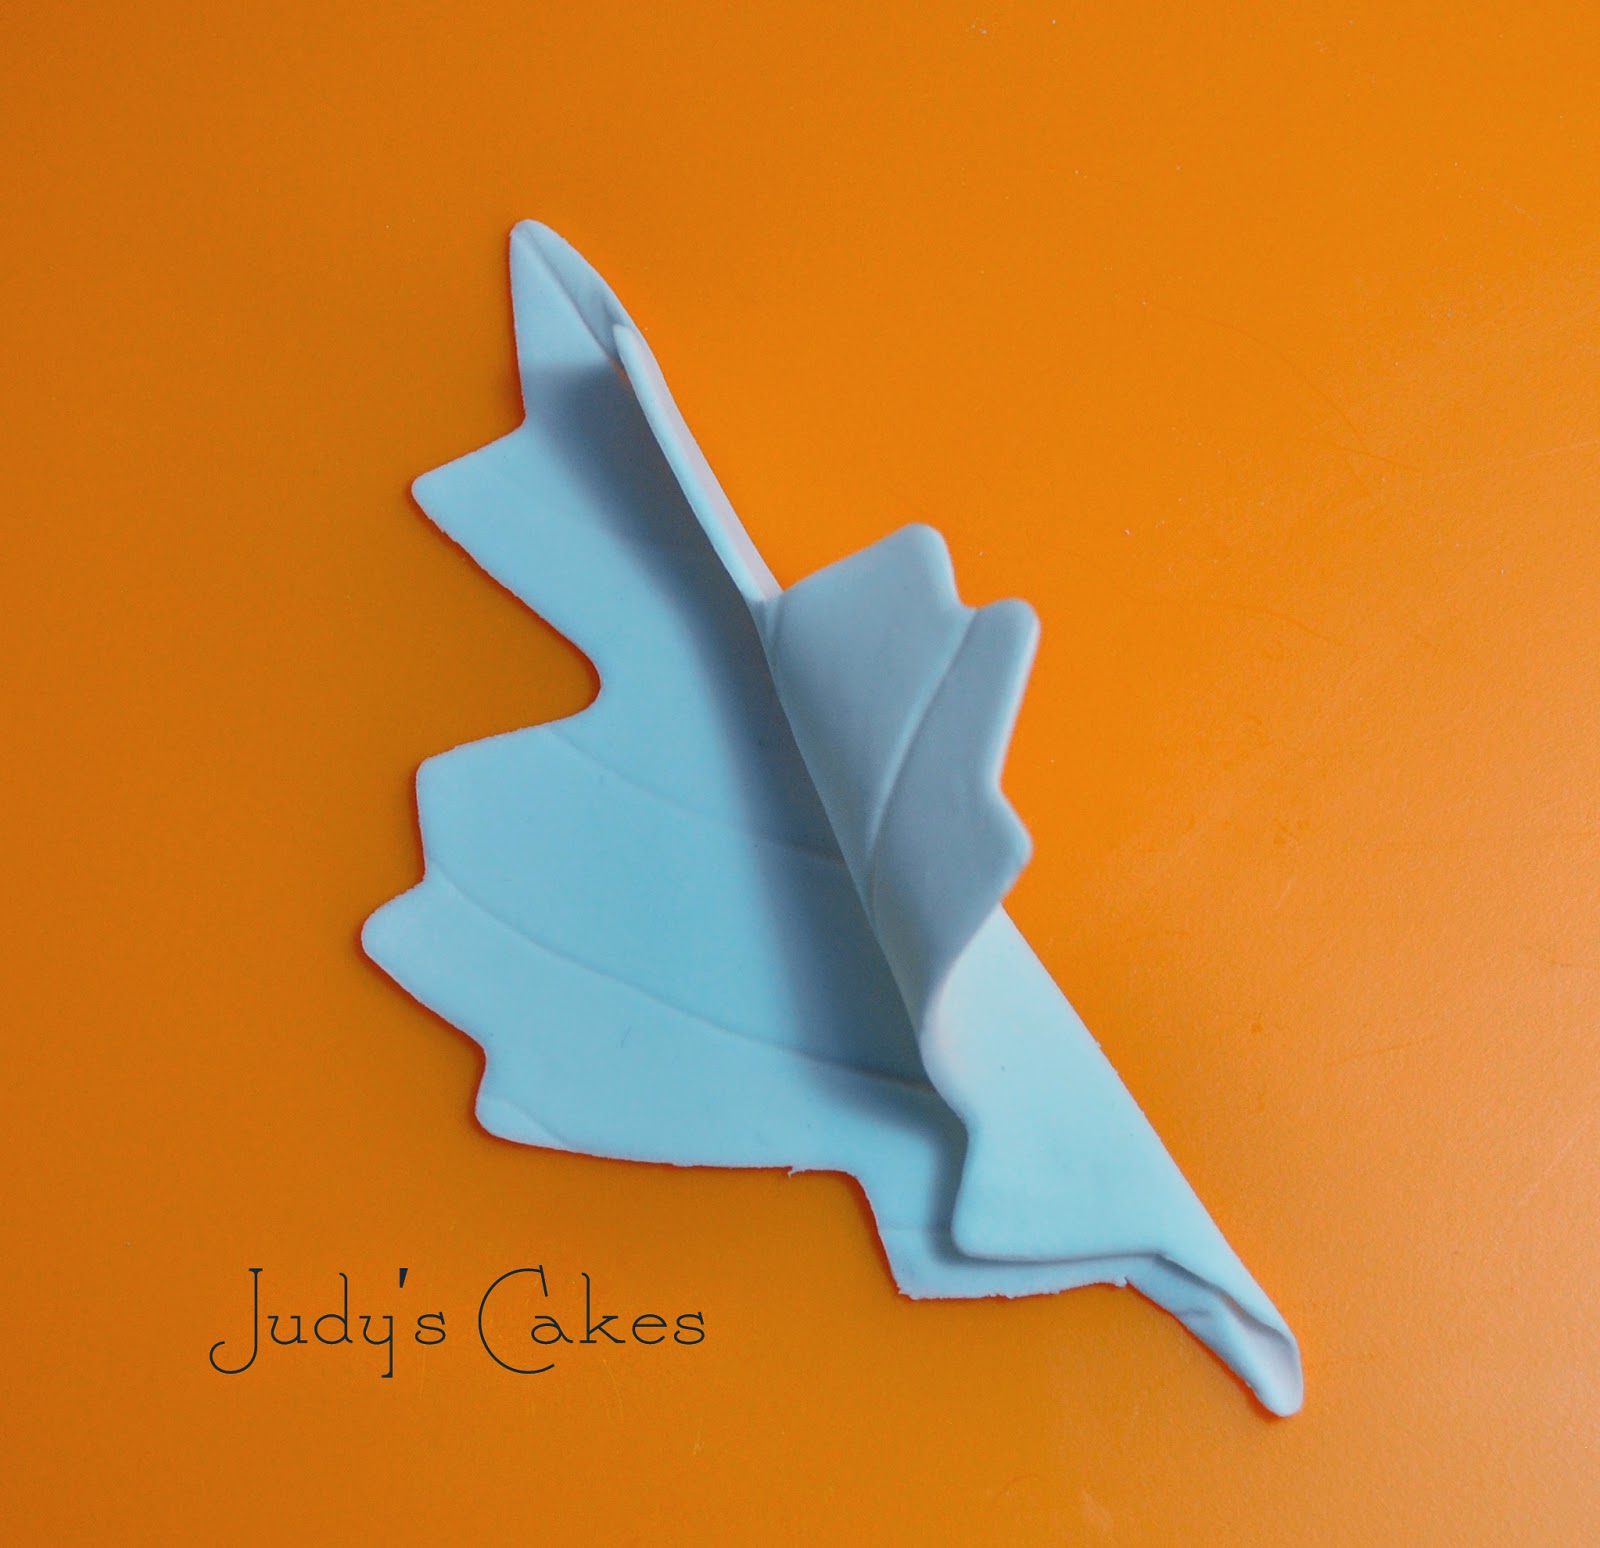
Fold your leaf in half to make the center vein more defined.

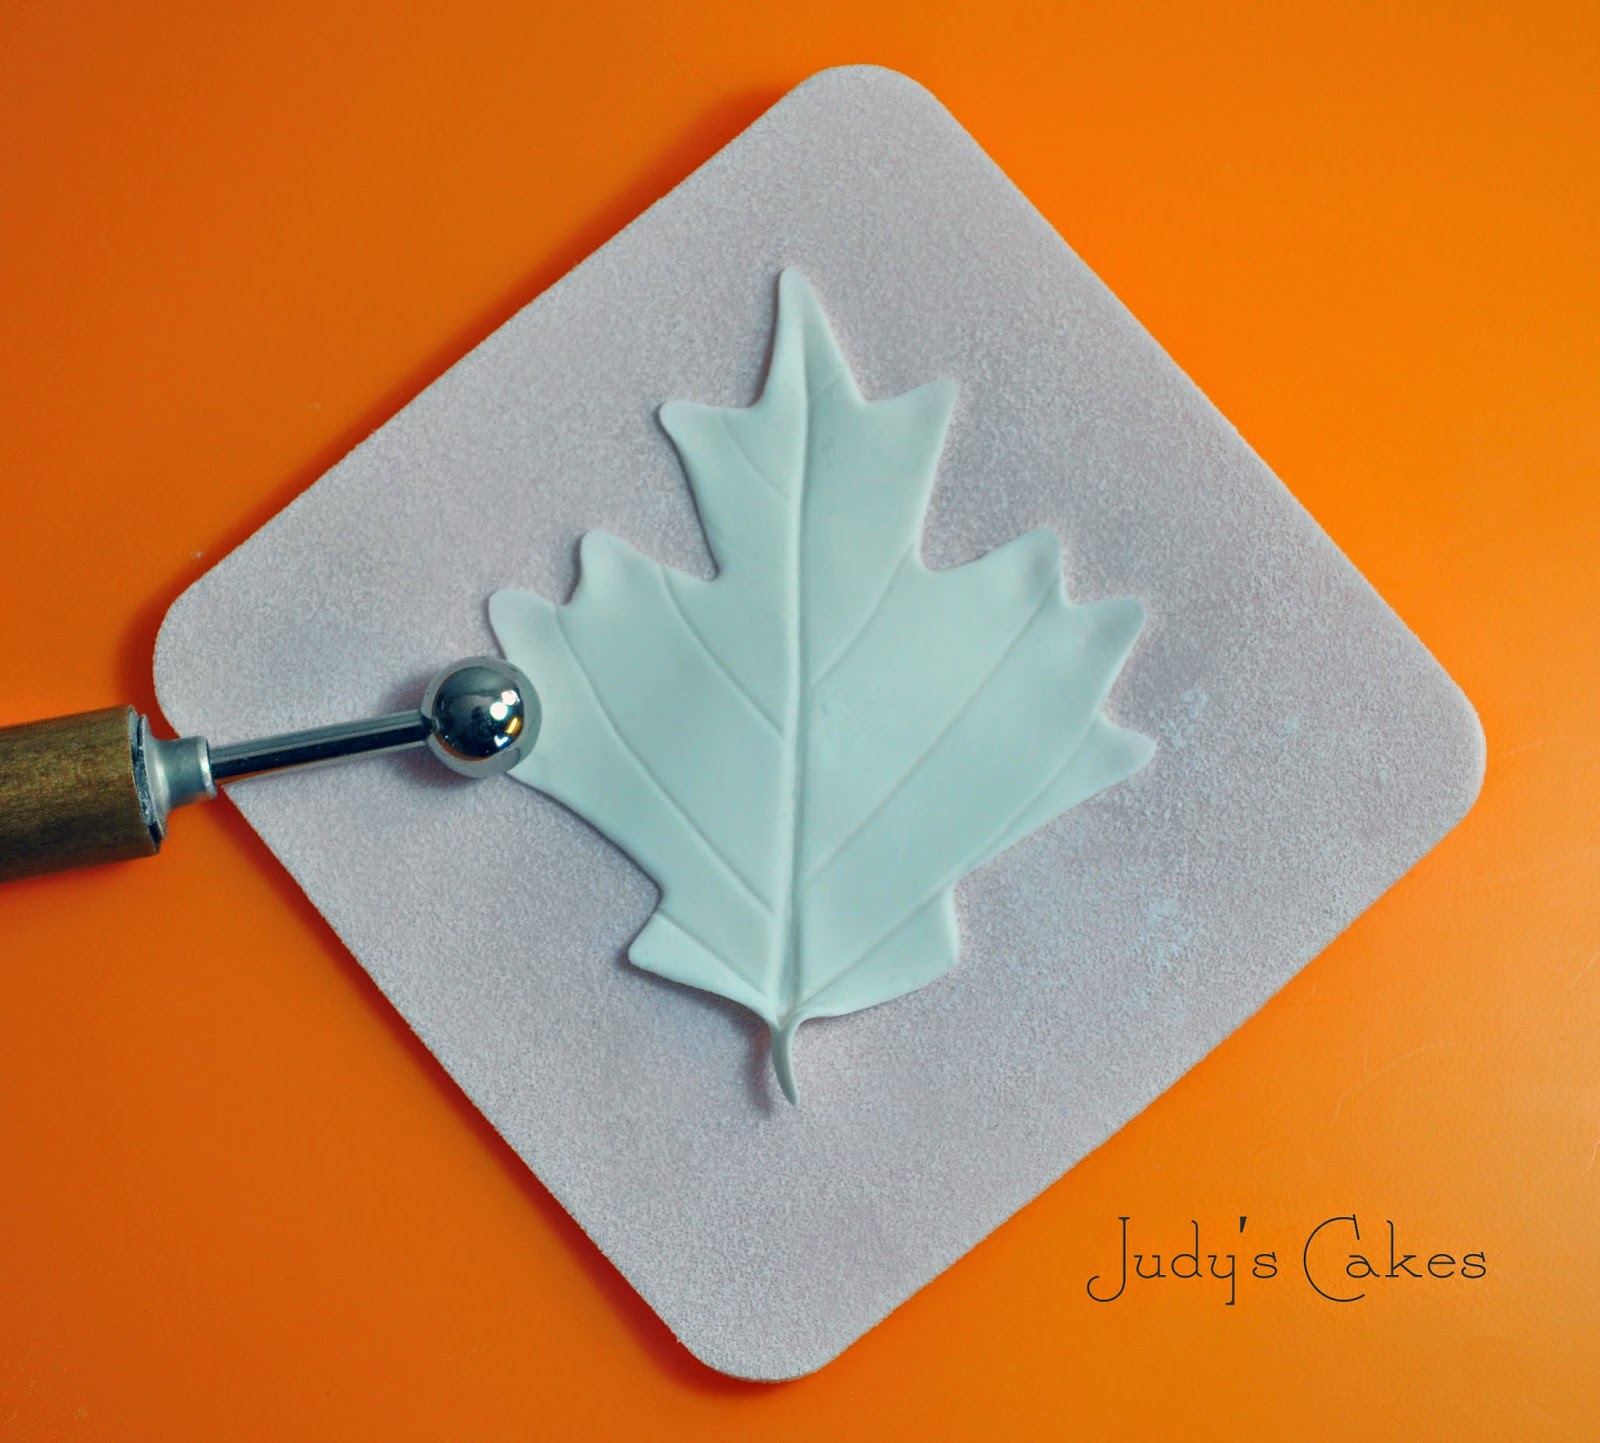
Place the leaf on a foam pad, then use the ball tool to thin the outside edges of the leaf.

Using your fingers, pinch together the bottom stem and the tip of each rounded edge on your leaf. You can see above that the edges on the right side are pinched, while the edges on the left are not. Forming little points like this instead of leaving the edges round makes a huge difference. I think this one of the most important steps in making your leaf look more realistic.

Here's the finished leaf!  Dry your leaves on crumpled aluminum foil or egg crate foam to keep them from being too flat. Now let the leaves dry completely before adding any color.


Learn how to add color to your leaves by reading the second half of this tutorial tomorrow. In part #2 we'll use colored gum paste (instead of white) to make the leaves. The difference is that when you dust color on white gum paste, the leaves will have more of a pastel appearance. While leaves made with colored gum paste will look bold and bright when you're done. The same steps, however, apply regardless of what color gum paste you decide to use.  
Click here to read Part #2.


COMING UP NEXT-

Part #2: Next I'll explain how to add vibrant colors to your leaves that will really make them pop!


Fall Cake

Tuesday, September 30, 2014

My last blog post was all about the tragedy of my poor broken dahlia. Well, here's the cake where my dahlia is now lives... 


Happy fall!!! :)

Note to Self: 12 Rules of Cake Decorating

Monday, September 29, 2014

NOTE TO SELF: 

1. It takes 2-3 days to complete a large sugar dahlia flower. (I already knew this.) 
2. When applying the final row of petals, do not sit on the foot to view flower from above. 
3. Sitting on your foot for an extended period of time may cause paralysis in that extremely. 
4. While standing up, be aware that said foot may be completely asleep. 
5. When trying to use this appendage, remember the foot will be completely numb and ineffective. 
6. Putting weight on it at this time, may cause the foot to suddenly collapse under your body weight. 
7. A rapid decent will ensue causing you extreme embarrassment! 
8. CAUTION: DO NOT, I repeat... DO NOT hold the sugar dahlia while testing this theory.... during your rapid decent, said sugar flower may suddenly fly from your hand landing face down upon the tile floor. 
9. Be very cautious, small broken pieces of the delicate petals will fly in every direction causing extreme anger and frustration. 
10. Be careful which words are allowed out of your mouth at this time! Language may contain a colorful hue. 
11. The next day you may see areas of purple and green coloring located on various parts of your body. There may also be slight pain and stiffness involved. 
12. The best remedy for this situation? Take a deep breath and relax.... it's only sugar. Life goes on, it could be a whole lot worse, and sometimes unexpected events force you to stretch your limits. You may even end up accomplishing things you didn't know you could! 

NOTE TO SELF: 

After all was said and done... I did a little petal repair and was able to salvage my poor broken dahlia. It's not perfect like it was before... but hey, nothing in nature's ever perfect anyway. Right??? I decided it gave my flower a little unexpected "character". And hopefully, I gained a little character along the way as well... ;) 


(Not to mention a pretty good story!) 

Pink & Lace Cake

Tuesday, September 16, 2014

I love it when things come together better then expected!!! 

Usually I have a pretty clear picture in my head of how a cake will turn out. Sometimes I'm excited and eager to get started on it... at other times I'm a little worried. I'll have to admit, that I was worried about this one. The cake pictures I had to work with were two completely different types. One cake was modern and minimalistic in it's style; while the other was very frilly, delicate, and more traditional. I just couldn't imagine the two styles combined together into one. But when all was said and done... I was very pleased! Oh Happy Day!!!!!


I placed a pearl border around the top edge of each tier. Then I added another pearl trim above the row of lace points. (Someone else called them lace "scoops"...LOL.) The pearls seemed to pull the two looks together very well.


So, my son had the camera. He likes to take pictures of me while I'm setting up the cakes. Sometimes the looks on my face are... well... not very flattering. You know when you get in "the zone", and you're unaware of everything else around you? Apparently, I pull some strange faces when I concentrate really hard. My face isn't too bad in this picture... so I decided to post it. Maybe one day I'll post the ugly ones too. (Yeah right, maybe when pigs fly. LOL)

Vote for My Gingerbread House!!!!

Sunday, December 2, 2012

Well, I finally finished my gingerbread house. YEAH!
And....... I entered it into a local competition. EEK!!!

So now I'm going to loose all my pride and beg you to please go and vote for it! (It never hurts to beg...right?) LOL

I'm a little behind in the voting right now so I'm hoping you'll help me out. If I win, they will donate $1000 to a charity of my choice. I chose "Share a Smile". This is a charity organization started by Dr. Eric Vogel DDS. He's a local dentist who travels to other countries around the world providing free dental care to those in need. He's a great man and it's a great charity! Dr. Vogel is battling cancer right now, so I'm sure he'd be even more grateful for the donation to help his organization and to help these people in need.

Here's how you vote. Go to this facebook page:

https://www.facebook.com/ivoryhomes?sk=app_180881568718542

First you'll need to "like" the Ivory Homes facebook page. (You can always "unlike" it again after you've voted.) Then a page will come up with pictures of all the gingerbread houses in the competition and you can cast your vote. My house is #9- Anderson Family. The voting lasts until Wednesday (December 5th). Thank you sooooooo much for your help. I really appreciate it!

I'm always a little leery of contests like this. Too many times they turn out to be more of a popularity contest then a contest based on ability. So we'll see what happens. But I'm still BEGGING and PLEADING for your facebook vote!!!! ;)


I had a lot of fun putting this house together. However, it took sooooooo much longer than I'd ever imagined! It wasn't the decorating that took so long... it was the construction. I'd glue a few pieces together with royal icing, then wait, and wait, and wait for them to dry before I could continue. This house had so many pieces that my daughter's bed was completely covered with cookie sheets and boards filled with gingerbread house pieces! Anyway, here are some pictures.

One of the many boards covered with gingerbread pieces.

Some of the pieces a little farther along.... plus the little Christmas trees I'll put in 2 of the windows.

For the windows I used gelatin sheets. They work really well because they come with the diamond design already there!

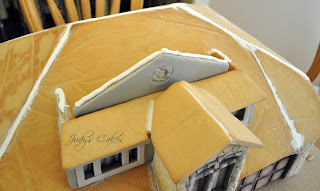
Starting to put it all together. The white sections are where windows will be placed. And to the left is the beginnings of a large Christmas tree. It's made with Rice Krispie Treats and covered in white chocolate.
Here's the same Christmas tree covered in fondant. I'm about half way done clipping little sections to make it look like a pine tree.

Getting the roof put together... it was sooooo nerve wracking!!! I was worried it would fall in, but it held together very well.

I colored the gingerbread dough a dark brown color. To make the shingles I rolled out the dough and made impressions with a fork to create some texture. After cutting out the  little squares, I trimmed off the bottom edge with a wavy blade. This added an awesome detail to the shingles. I baked them for 12 minutes and they were done.... did I mention I made approximately 1700 little shingle pieces!!!! Wow, it took the better part of a full day just to make these little squares. But I was very pleased with the end result!

Adding the shingles... see the 2 large bowls filled with shingles. Every time I closed my eyes all I could see were little brown squares.... LOL


Here's the stone siding. On the right you can see what a difference it made after I brushed a little gray petal dust into each of the cracks.

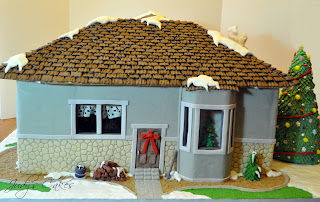
The finished product!!! :D

Here you can see more little details like snow on the rooftop. The base board measured 34 x 28", and the house was about 16" tall.
This is a closeup of the front. In the windows you can see a Christmas tree and a picture of Santa Claus hanging on the wall.
The little lights were chocolate covered sunflower seeds.

On the left you can see the large finished Christmas tree. Cotton candy made great smoke coming from the chimney.

This is the right side of the house with a small tree trying to hang on to the last little bit of Autumn.

View of the back.

Close up of the back where you can see a 2nd Christmas tree in the bay window. The other window has frilly lace curtains. Just outside the door is a stack of wood, an ax, and a bucket of coal waiting to keep the little house warm and cozy for the holidays!
Making this gingerbread house kind of reminded me of pregnancy. Quite often after your first delivery, you vow to never put your body through that again! But over time you forget about the morning sickness, mood swings, discomfort, and pain. You begin to remember the good times... and after a while you decide it wasn't so bad after all. Then you end up having another child.

Will I ever attempt another gingerbread house with this much detail???  Give me a few months to forget about the 2 weeks... all day... everyday... the late nights... and the early mornings I spent working on it. Then come next October or November I'll probably decide it wasn't so bad after all and end up doing it all over again!!!

In the mean time..... GO VOTE!!!! :)

Blog Design by Nudge Media Design | Powered by Blogger