If you don't have a lot of time... this tree can be put together pretty quickly.
One thing to keep in mind with this tree, is that it has a definite front and a back. The ends of the strips will meet together in back. Even if you join the ends very neatly, the line will still show. So put the back side of this tree where it isn't noticeable.
 |
| Simple yet elegant... |
 |
| Begin with a fondant cone shape. |
 |
| Roll out some extra fondant. |
 |
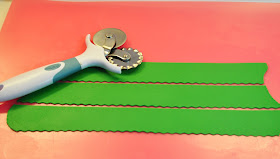
| Using a pastry cutter, cut the fondant into strips with the wavy wheel. (My strips are about an inch wide.) |
 |
| Start at the bottom and attach the first strip (wavy side down) with a little water. |
 |
| Continue adding more strips, overlapping them as you go. |
 |
| Cut out a small circle of fondant. |
 |
| Go around the outside edge of the circle with the wavy wheel so it matches the fondant strips. |
 |
| There you have it... another tree to mark off your list! |
One thing to keep in mind with this tree, is that it has a definite front and a back. The ends of the strips will meet together in back. Even if you join the ends very neatly, the line will still show. So put the back side of this tree where it isn't noticeable.

Beautiful beautiful beautiful your Christmas trees! Congratulations to your skill. I'll definitely try to make some. Thank you.
ReplyDeleteThanks,Daniela! Do give them a try.
ReplyDelete~Judy