"Oh no! I'm out of powdered sugar." Have you ever said that? I've said it way too many times. I've turned my pantry upside down searching for powdered sugar but didn't find any. So I go downstairs thinking there must be more powdered sugar down there. Nope, no powdered sugar anywhere... I'm completely out. Ugh! I knew I should have picked up a few more bags while I was at the store!
Several years ago, I ran across a frosting recipe that uses granulated sugar instead of powdered sugar. It's a great "fudge type" chocolate frosting that's very easy to make. As a matter of fact I've never had a problem with this recipe, it's always turned out great... unlike other fudge type recipes I've tried. This frosting's good on cakes, but it's especially tasty on brownies or cookies.
*** ADDED TIPS! Please read what I wrote below.
One Minute Fudgy Frosting
2 C granulated sugar 4 oz. bitter baking chocolate
6 Tbls. milk or cream 4 Tbls. butter
1 egg 2 tsp. vanilla
1/4 tsp. salt
 |
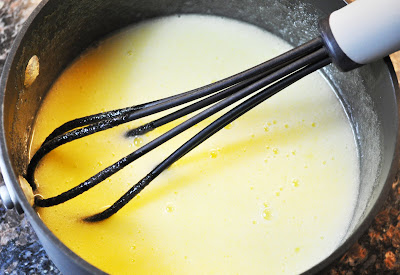
| Put sugar, milk, salt, and egg into a saucepan. Stir together until well blended. |
 |
| Add the chopped chocolate. |
 |
| Melt ingredients over medium heat. |
 |
| Stirring constantly, bring to a rolling boil and boil for 1 minute. (* or cook to a soft ball stage) |
 |
| Remove from heat and pour into a mixing bowl. Add butter and vanilla. |
 |
| Mix on low until the butter melts and it's well combined. |
 |
| Beat on medium high until it thickens and looses it's gloss. (You could also a wire whip attachment instead of the paddle.) |
 |
| Frost your cake, eat, and enjoy! |
***
I've had some recent comments from readers who say their frosting wouldn't set up. I'm sorry this recipe didn't worked for you. I've added some tips that should help with some of your problems:
1. Make sure your frosting comes to a full rolling boil before you start timing.
2. If you find your frosting
doesn't set up after beating it for several minutes, then put it back into a clean saucepan and bring the mixture to a boil once again. Cook it to a soft ball stage. (I always check for soft ball stage by using the "cold water test".) After reaching soft ball stage, put the frosting back into the mixer and beat it again. This time it should thicken up nicely.
3. A couple of readers said they could taste an egg flavor in the finished product. The size of the eggs you used could cause this to happen. Have you ever noticed the difference in size between eggs that are all labeled as large? The original recipe I posted called for 2 eggs. So I decided to go back and do some testing. I've found that using one egg instead of 2 works wonderfully... is that even a word???? So I changed the recipe above to use only 1 egg.
Following the recipe exactly, measurements, altitude, humidity, and the weather
are just a few of the things that can affect cooking. I hope these tips help those of you who were having problems with the Fudgy Frosting recipe. (Sometime,
however, I swear there are little cooking demons hiding under the sink that come along just in time
to ruin our sweet treats!) LOL
Good Luck!!!!


